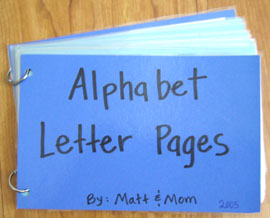
I have seen this Alphabet Letter Book done in different ways, but I chose to do a little half page book.
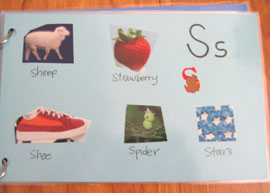
Step 1. I cut cardstock in half. I used 7 blue cardstock pieces and cut them in half with my paper trimmer. There is a letter on both sides of the half page, so there are 14 half pages altogether. Don’t put the book together yet. Keep the pages seperate until you are done. Step 2. I wrote each letter on the upper right corner of the page. Remember they are double-sided. It makes the book not so bulky. Make sure to put the Upper and lower case letter for each, very important in learning letters. There are 2 of each and kids need to learn both.
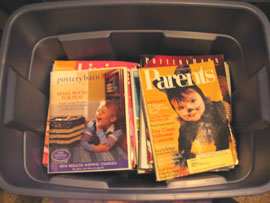
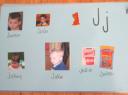
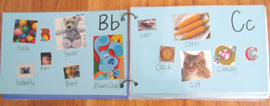
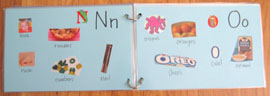
Step 3. We started with the letter Aa. Matthew and I opened up magazines and looked for pictures that started with Aa. I have a big stack of old magazines that I keep in a large tub for crafty things such as this project. I can’t bear to throw them away. A stack of old magazines is gold, and should have been on my Top 10 List.
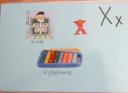
Step 4. When we found something that started with Aa, like apple, I cut it out and he helped me glue it in our book. Some letters are hard to find pictures for. So on a few of the letters, like Xx, I only have 2 pictures. This project took some time to finish. We did a page every other day or so. On some of the pages, we added in pictures of family and friends for the letter of their names. Matt loves to look at those pictures, especially his own Letter name.
Step 5. After we found all the pictures we could find for each letter, I wrote the name of each item under the picture. This can help your child later on when they are ready to start reading. We also found some fun letter stickers that we put on for each letter page. Step 6. I cut a dark blue cardstock paper in half for the front and back cover. I named the letter book, put the authors, and the year we made it. Step 7. I took my pages to a copy center to get laminated so the glued pictures wouldn’t fall off. Then I trimmed the lamination and put the pages in order. I also laminated because I want this letter book to last, as this was a project of love and all my kids will get use out of it. You can use self-laminating paper that is available at craft stores and sometimes is less money. Step 8. I put 2 punch holes in each paper and attached them with Book Rings. Now it’s a fun book to read with our kids, or having my kids read to me!