How to make an indoor hanging planter
Supplies
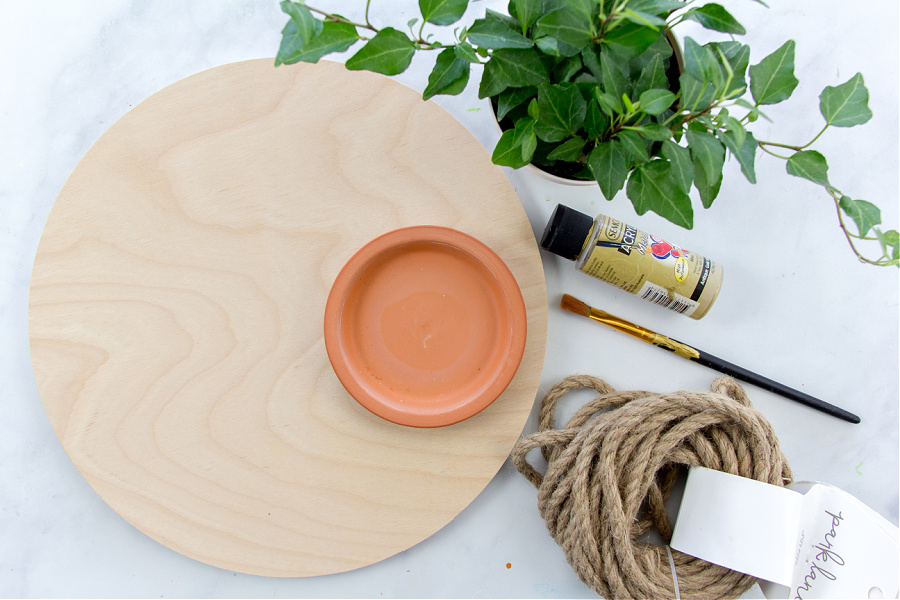
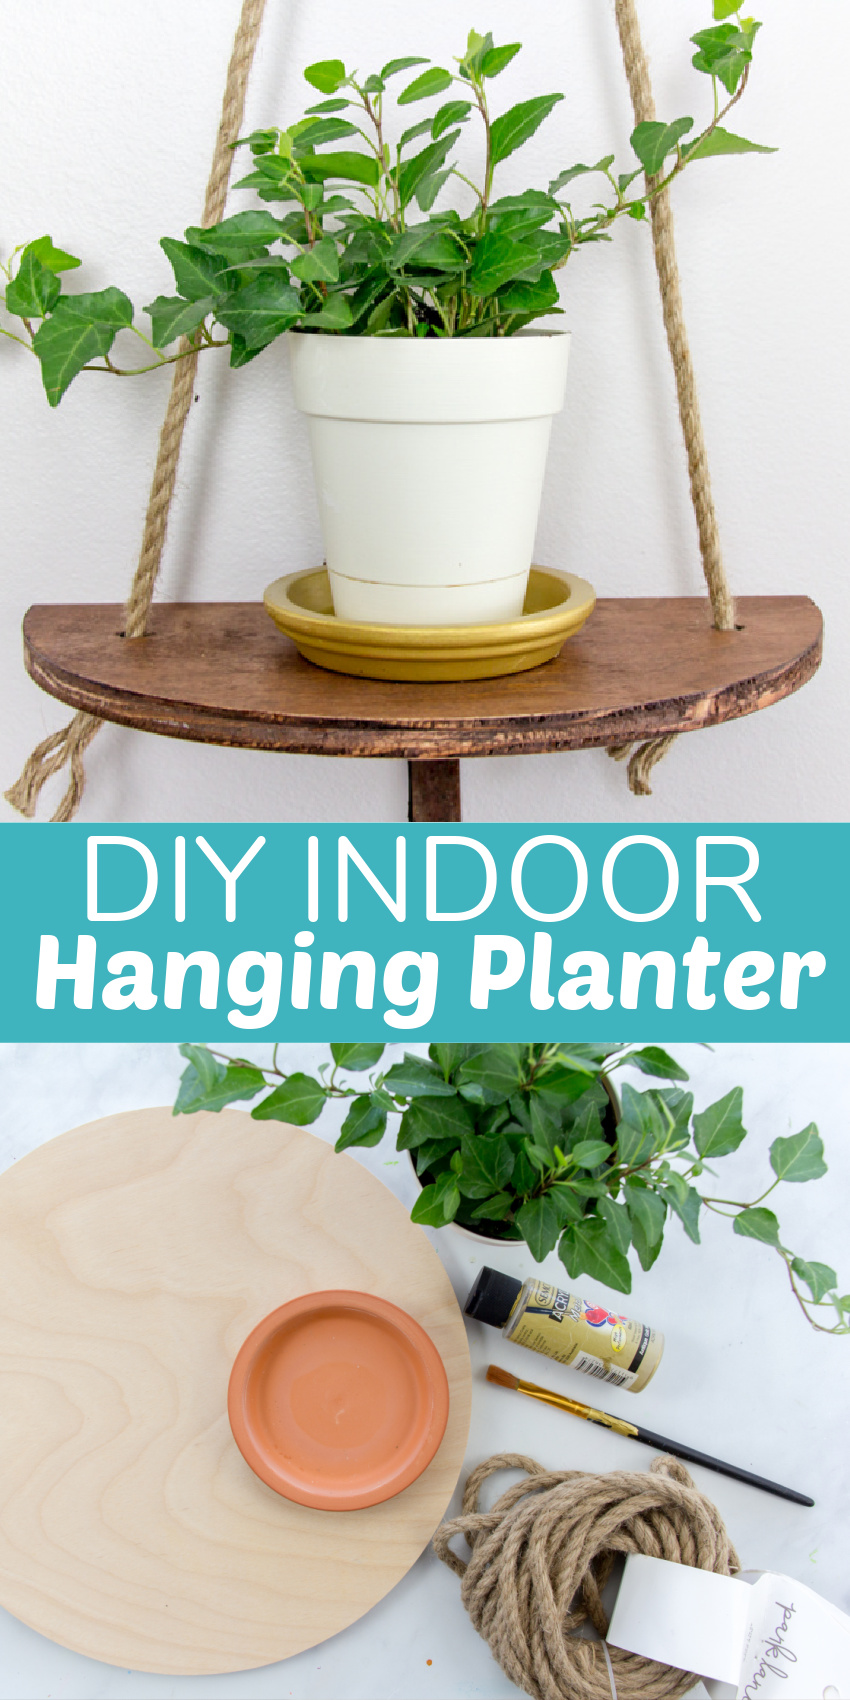
Wood circle – we used a Birch wood circle. Wood stain – red oak Jute rope Bracket Terracotta plant saucer Gold paint Outdoor Mod Podge E-6000 glue Plant Saw Drill
Note: We purchased a birch wood circle from Lowe’s, however, most craft stores will sell pre-cut wood circles too. You can make 2 hanging planters from one circle.
Instructions
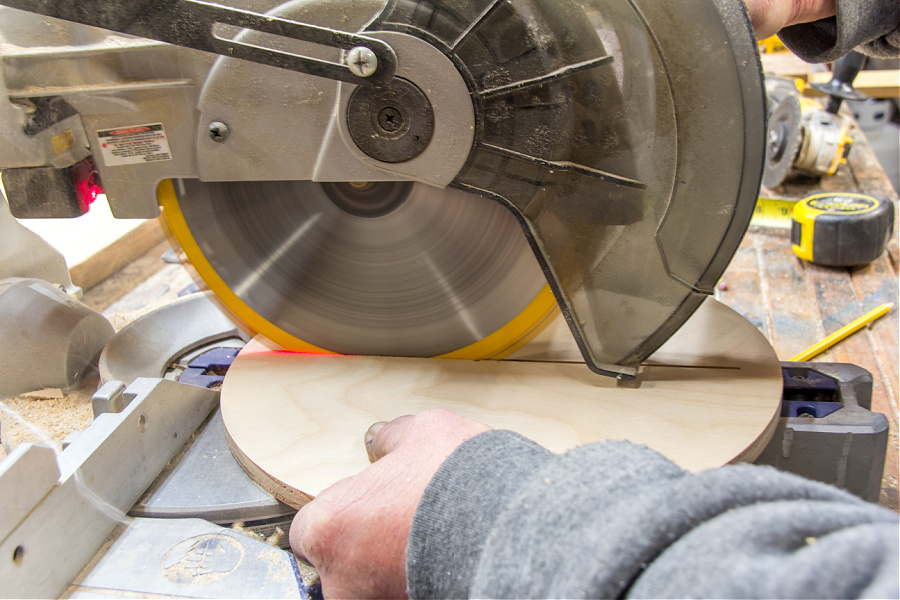
The first step is to saw your wood circle in half so that the straight edge sits flush against a wall. You can make two hanging planters from this one circle.
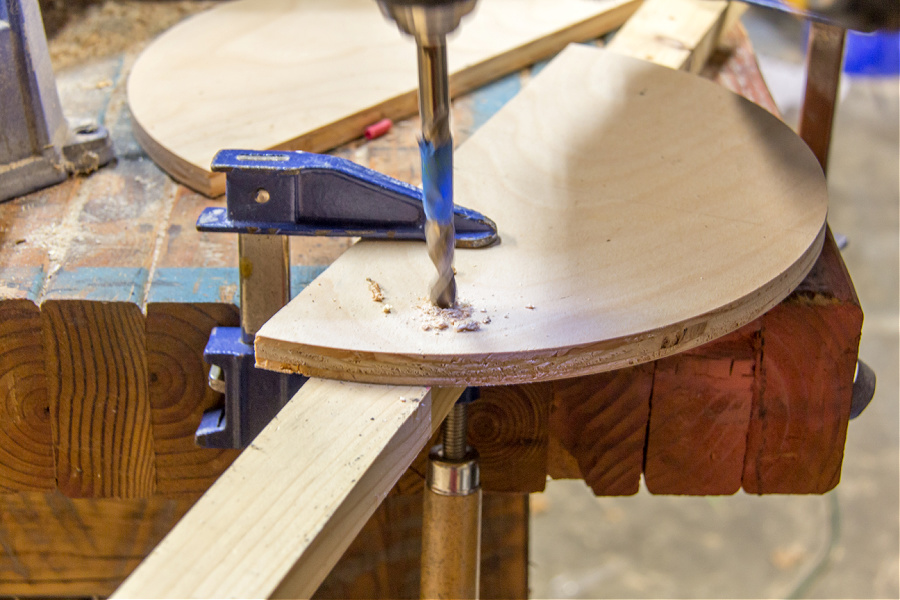
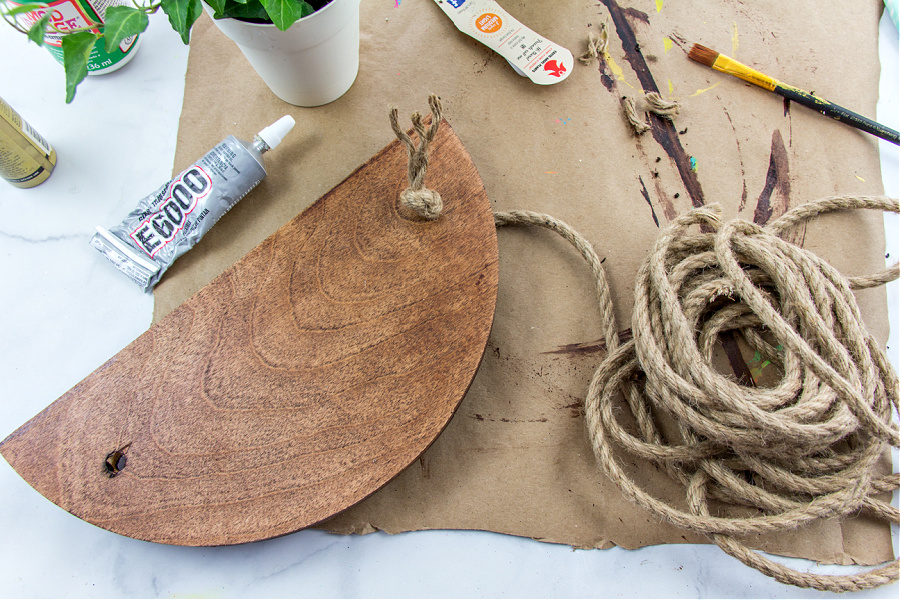
If you are hanging your planter off a hook, measure the distance the hook is from the wall and drill holes either side of your wood semi-circle. Make sure you use a drill bit that’s around the same width as the jute rope you’ll be using.
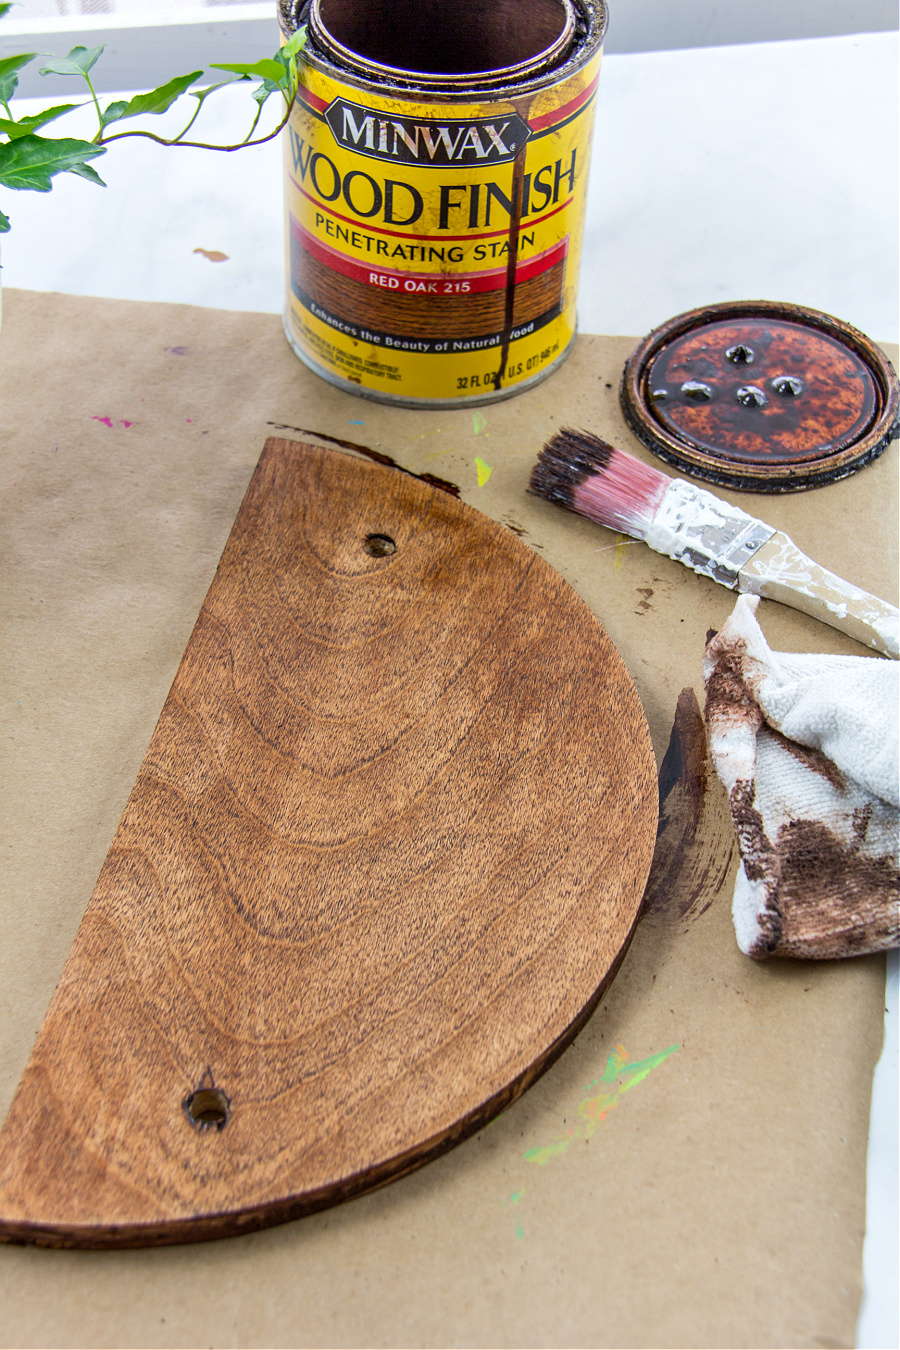
Tip: You can add a hole in the front center as well to stabilize your hanging planter, but I don’t listen to my partner’s advice and instead sometimes choose to do things the hard way because I want things to look a certain way. You’ll see more below about how I stabilized ours. The next step is to stain your wood. We had a tiny little bit of red oak stain left. I brushed it on, then wiped it off after about 5 minutes, and then set the wood aside to dry completely.
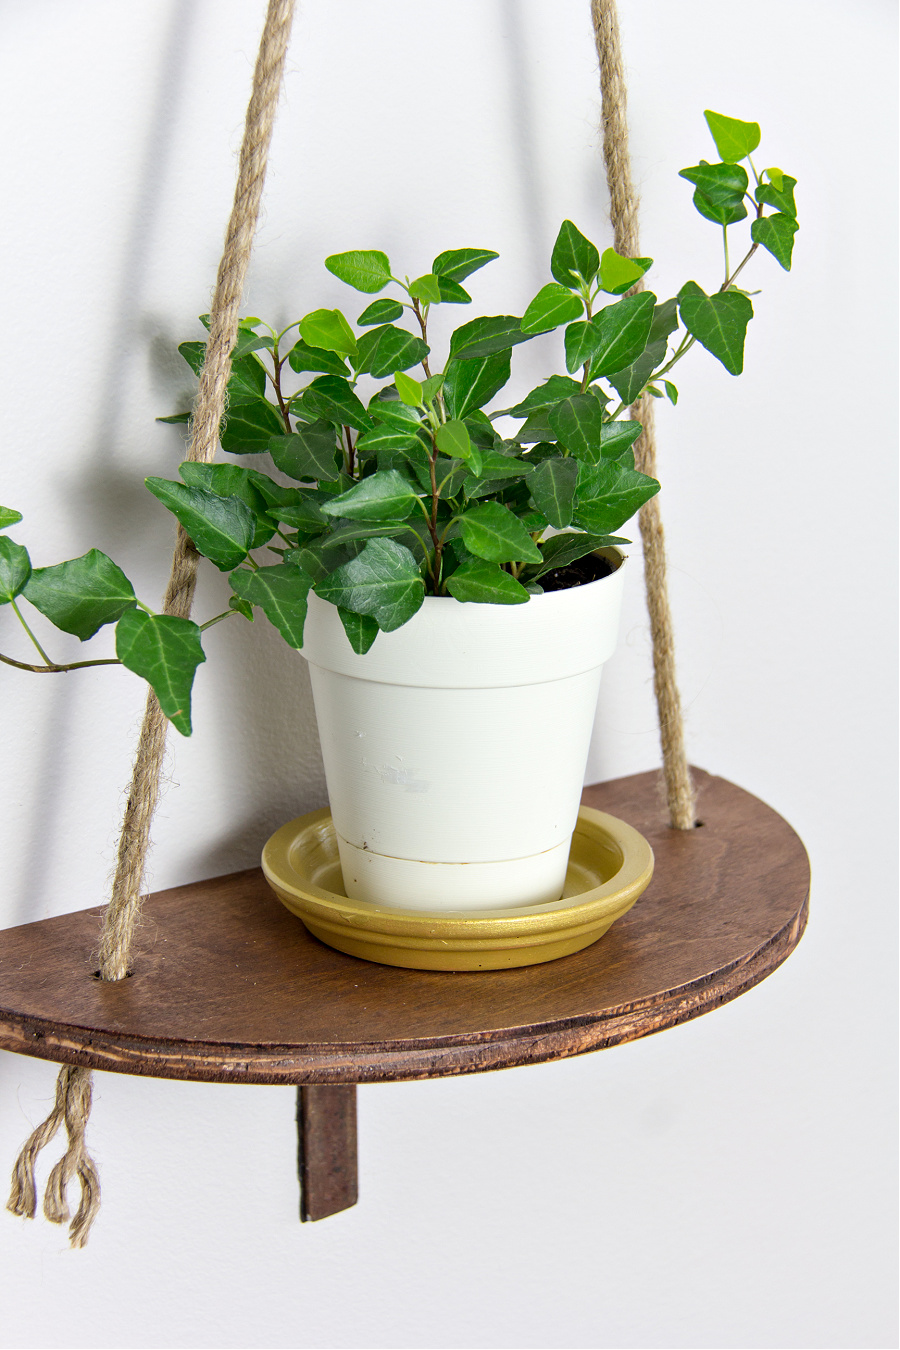
Paint your terracotta saucer with gold paint. Set aside to dry and then add a couple of coats of outdoor Mod Podge to help protect it from excess water that might run out of the potted plant.
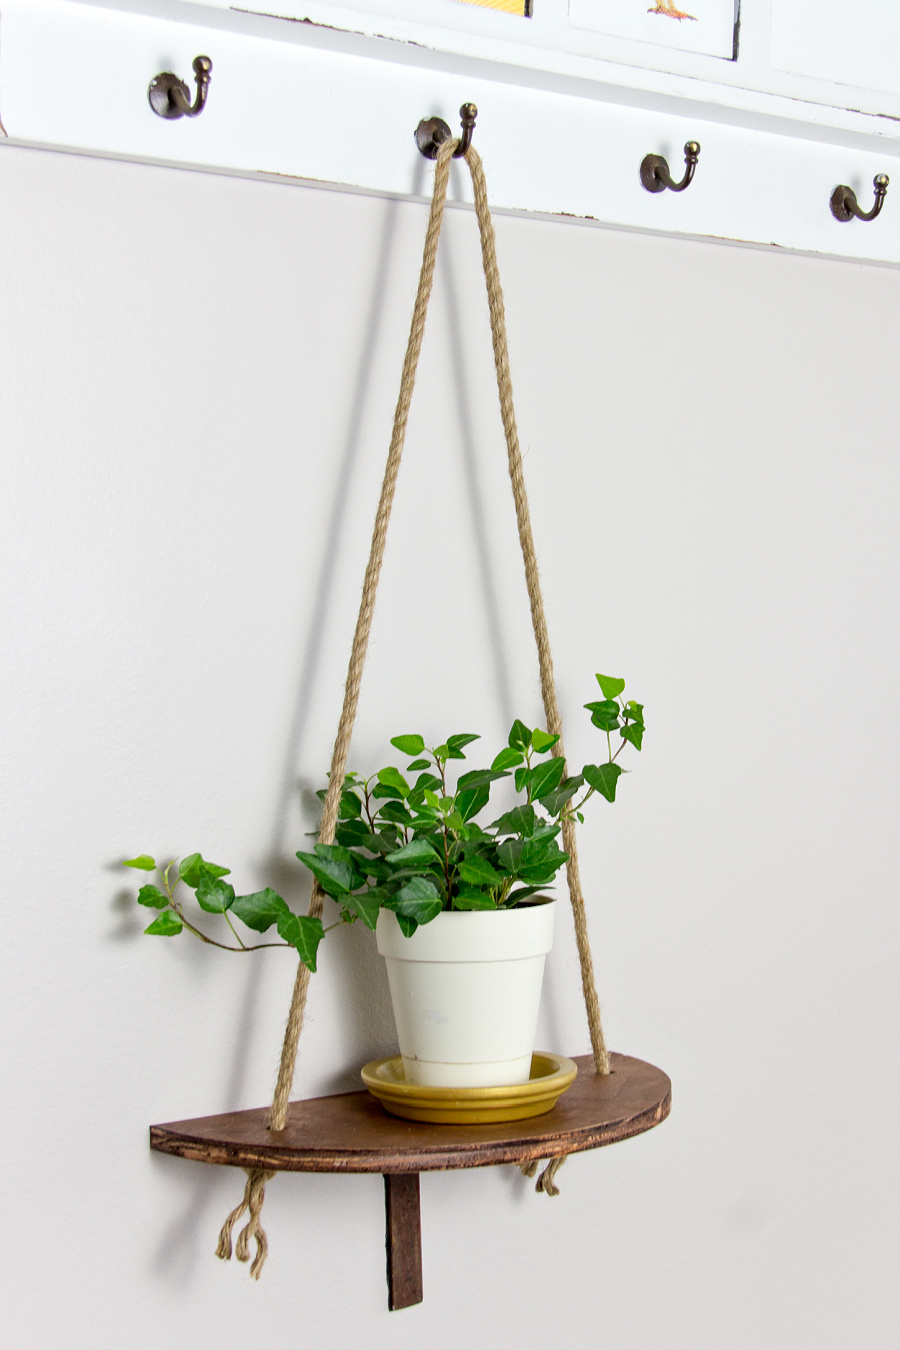
Using E-6000 glue, attach the terracotta saucer to the wood. The reason I did this is that I’m so incredibly clumsy and can see myself bumping into this too often to count and then having to constantly replace the terracotta saucers.
Cut a length of jute rope and thread the ends through the holes tying them underneath the hanging planter.
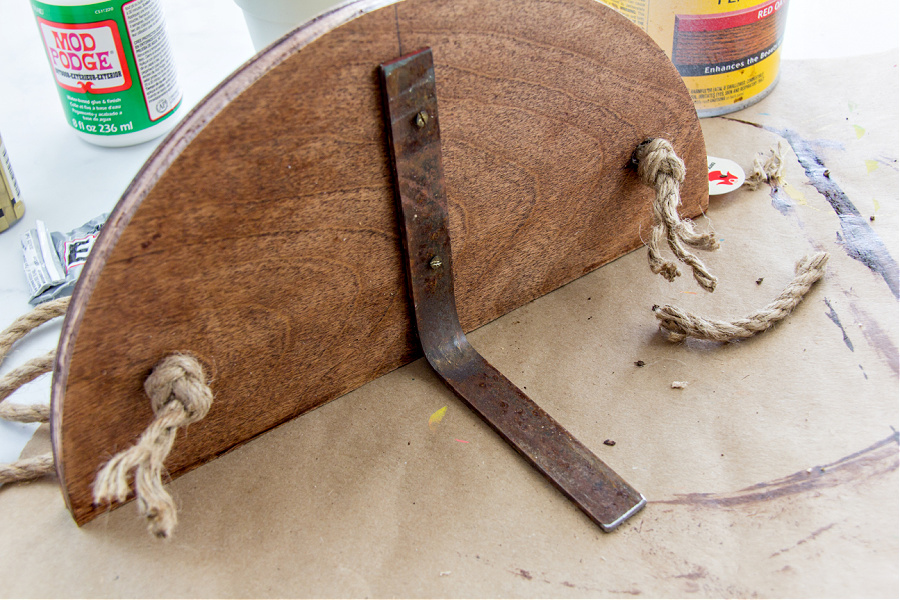
Here is the part where I didn’t listen about drilling that third hole in the front of the hanging planter. In order for the hanging planter to not tilt forward and my plant splat on the floor (yes, that did happen), we added a bracket underneath it, and then I used removable double-sided tape to attach it to the wall. You can screw yours to the wall, but I wanted it to be easier to move without adding another hole in the wall.
Please pin this post for later