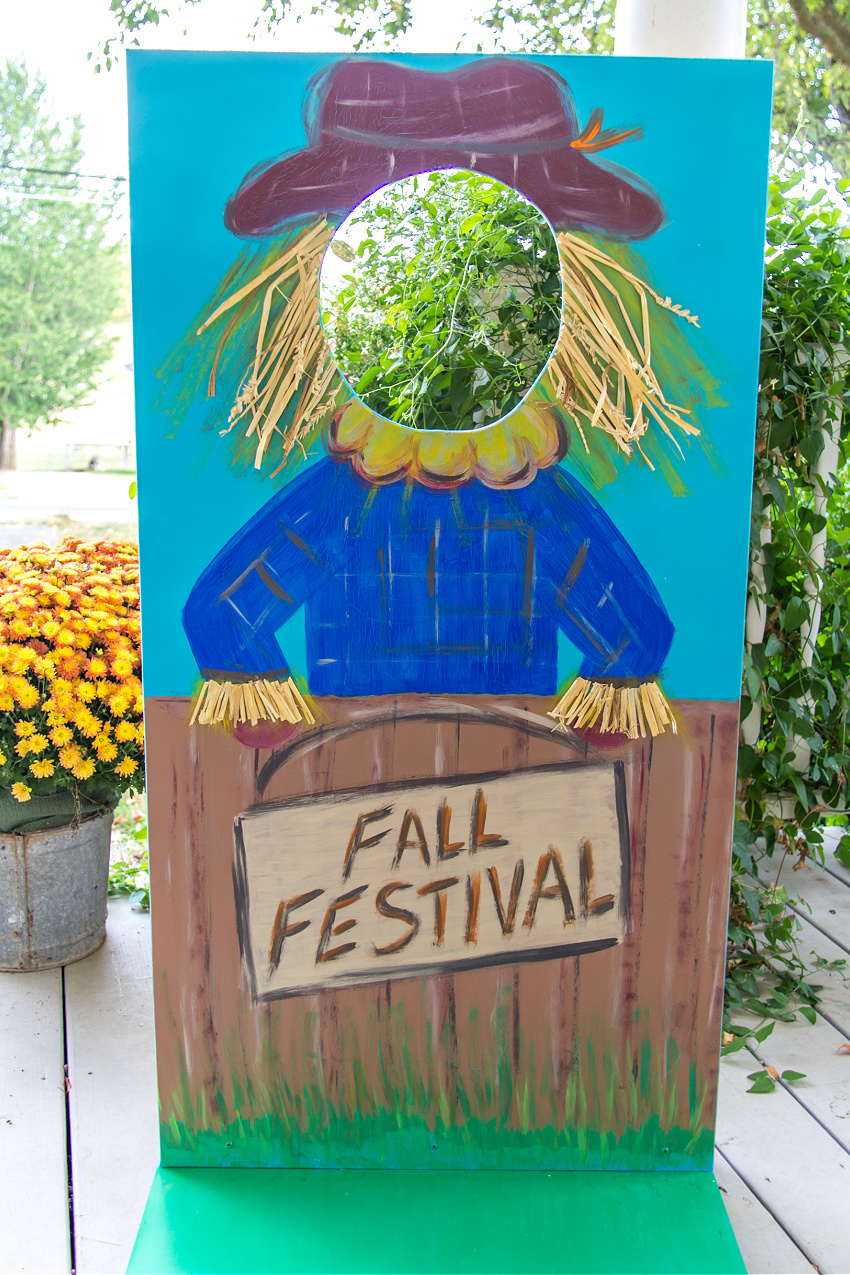
DIY fall photo booth board
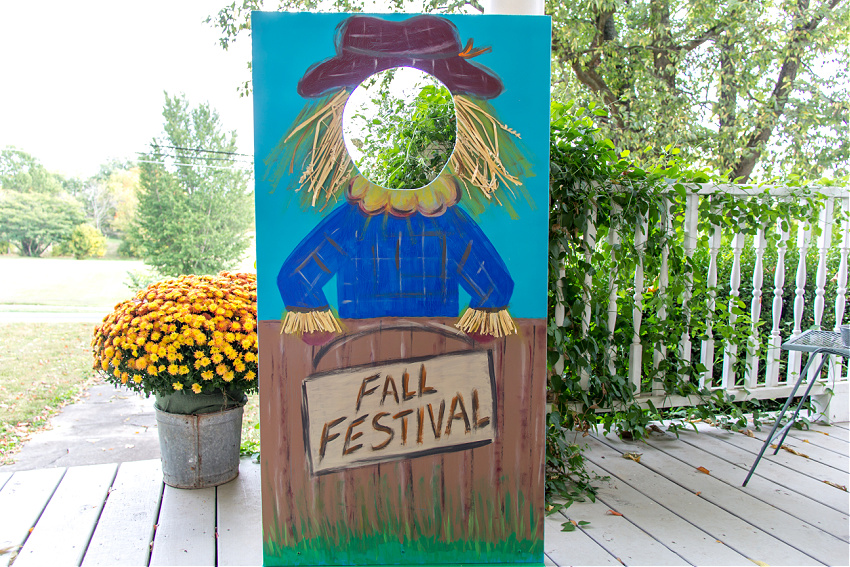
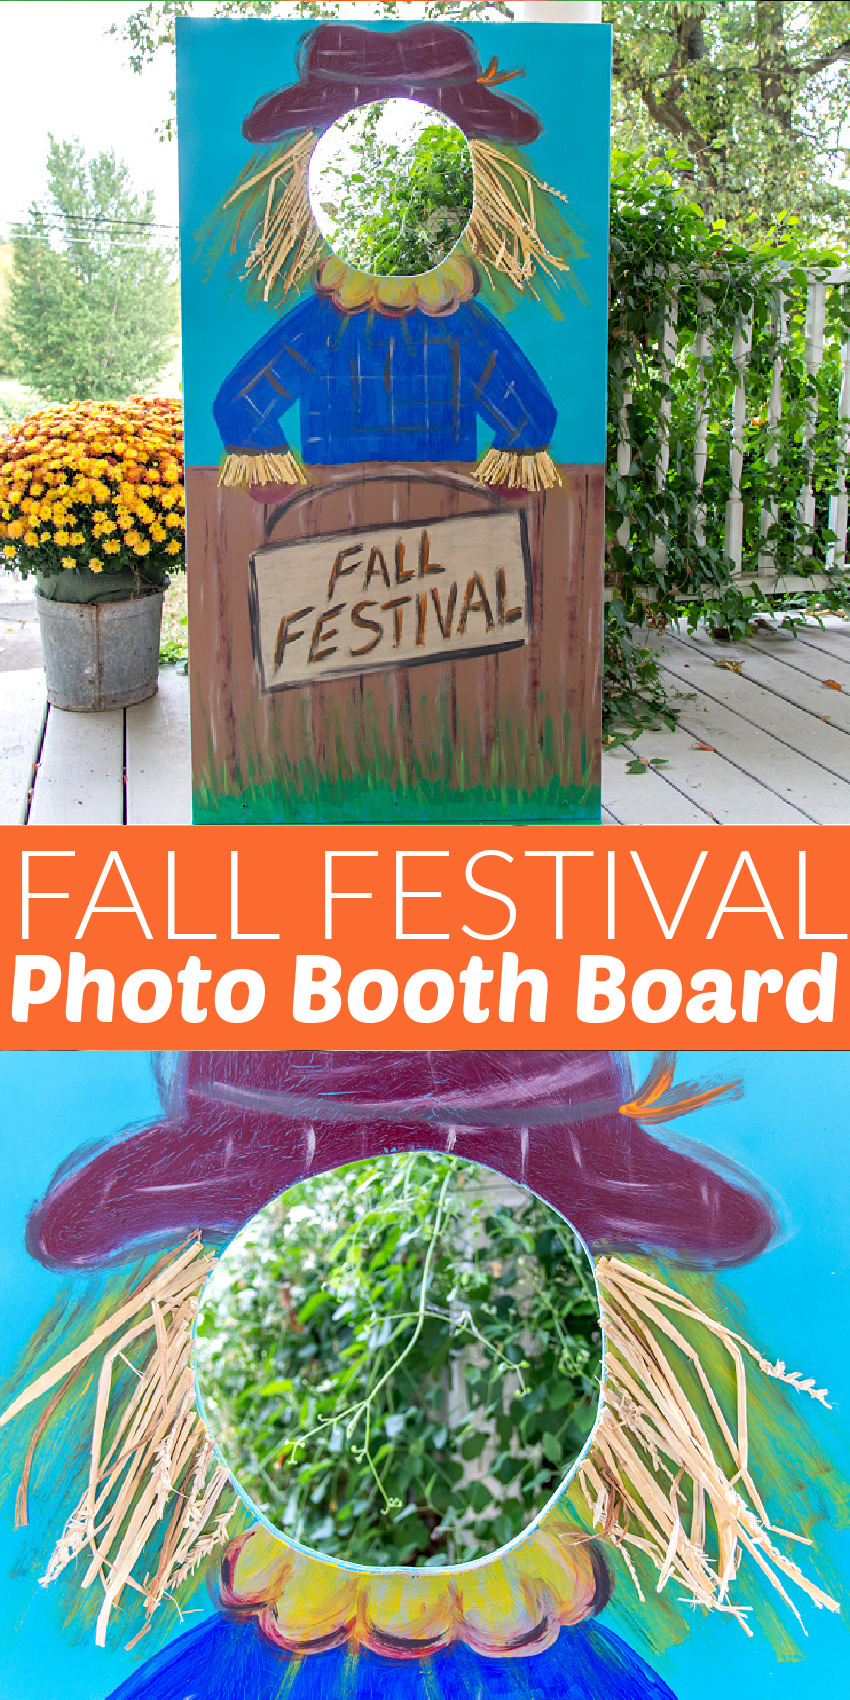
This scarecrow photo booth board is the perfect way to capture photos of the kids (and adults) all season long. We made this photo booth board for a fall festival at preschool so if you are making this board for older children and adults, adjust the measurements of the wood accordingly.
Supplies
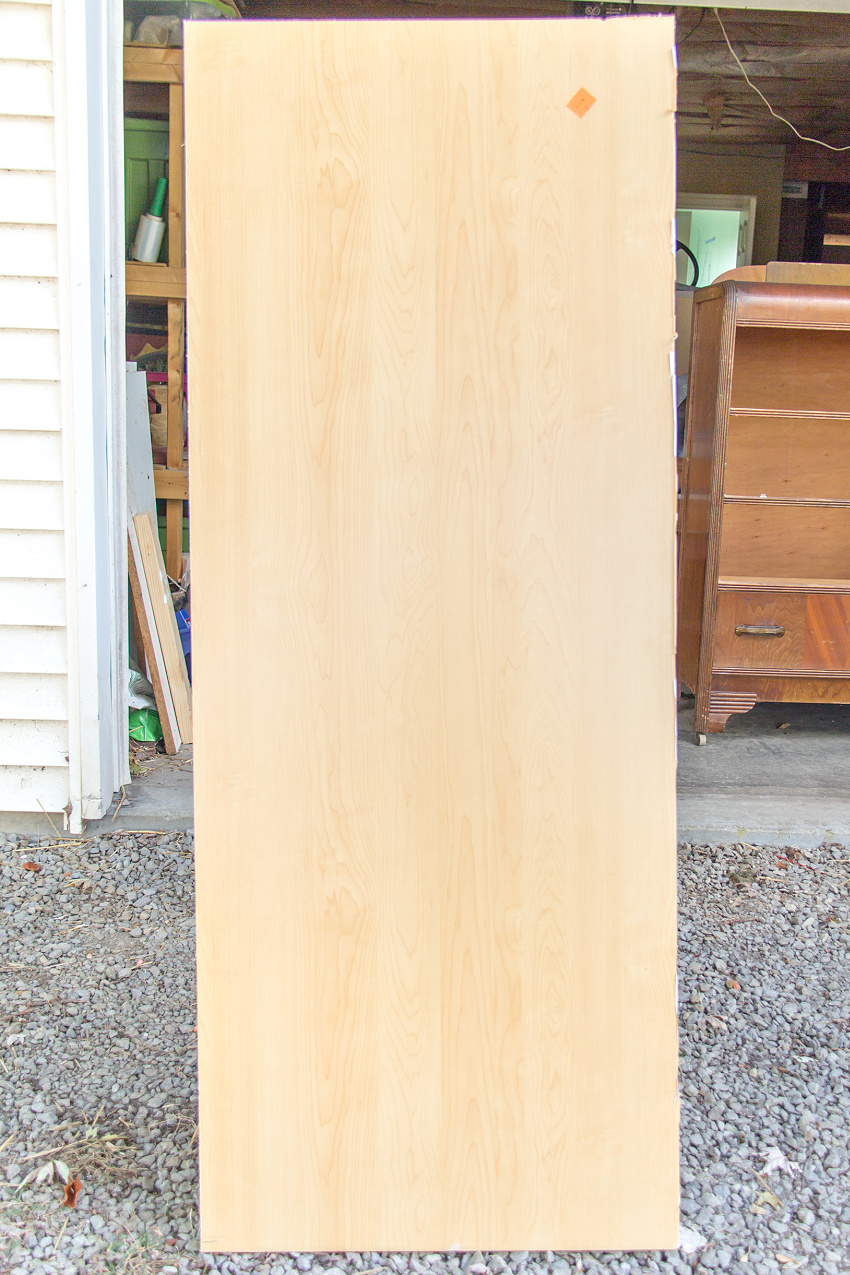
Plywood – ours was 1/2 inch thick and approximately 5.5 ft tall and 2.5 ft wide 2 x 4 wood (cut to the width of the plywood) Wood screws Saw Drill Paint – we used a combination of multi-purpose and spray paint Pencil Paintbrushes Straw Hot glue
Instructions
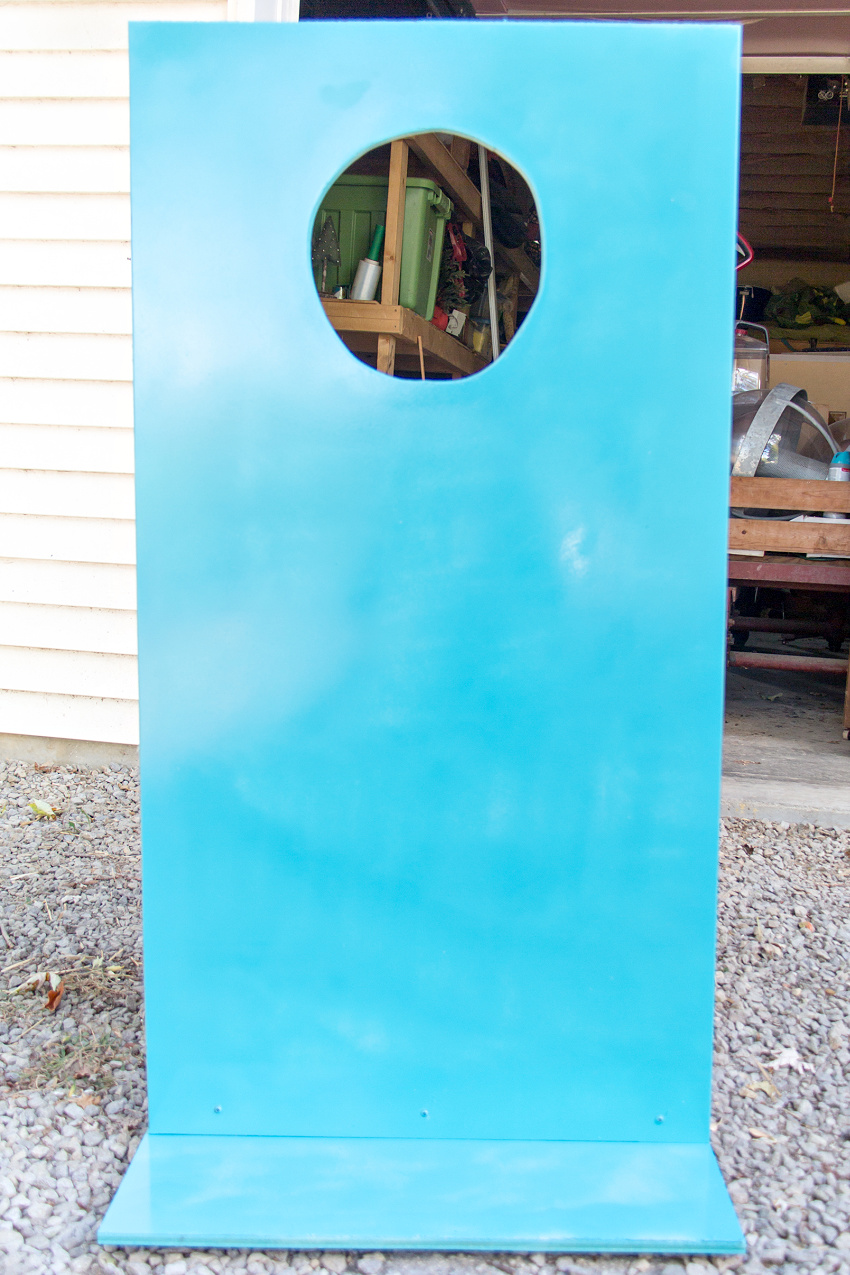
This is the piece of wood that we started with.
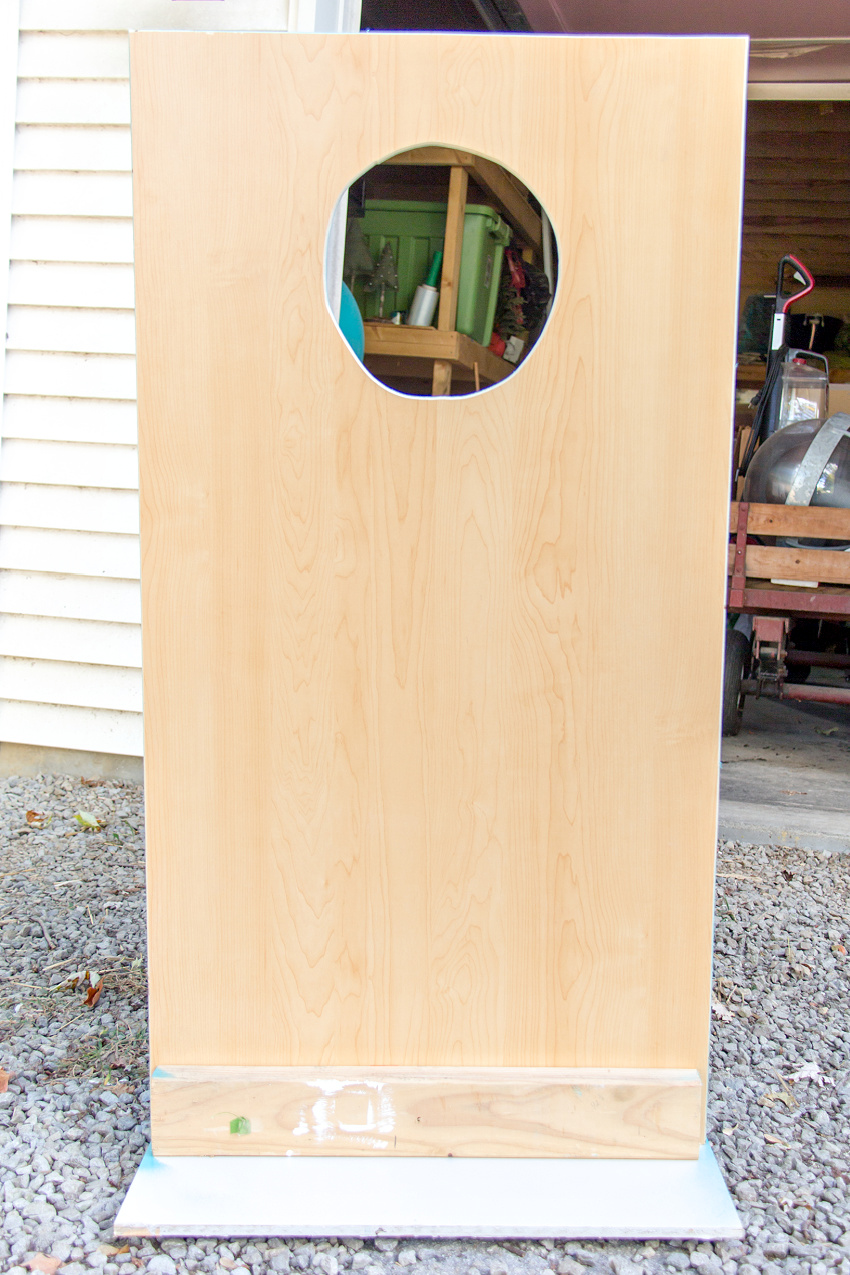
The first step was to cut about 1 foot from one end of the plywood. We used this as the base for the photo booth board to stand up. We then placed a small dinner plate on the board, traced around it, and then cut the hole for little faces to be seen.
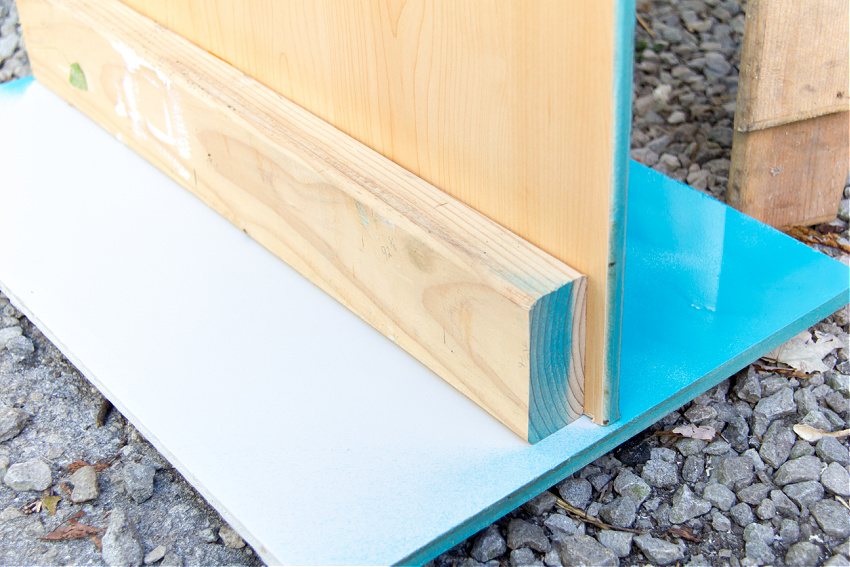
To attach the base to the plywood and make it stand up, drill wood screws across the bottom, and then through the 2×4 at the base.
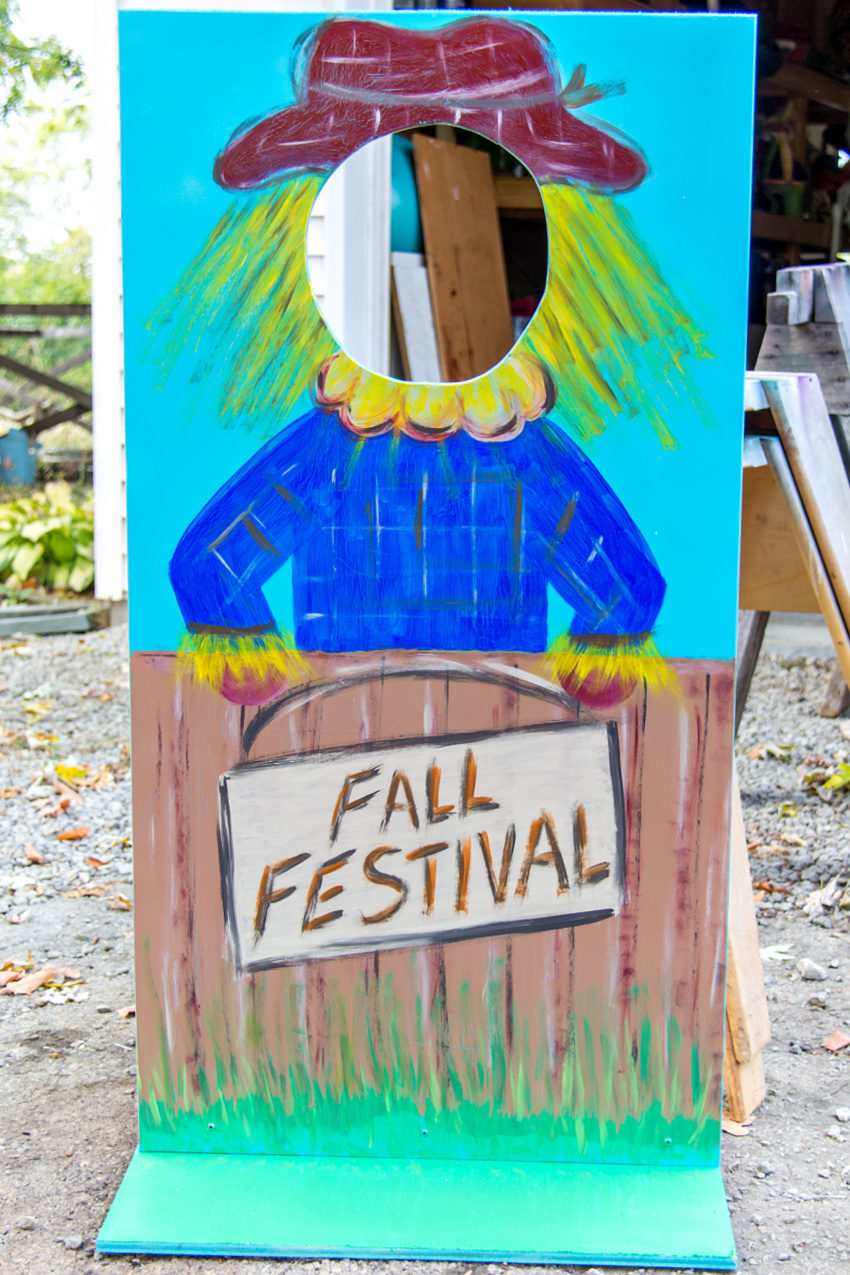
You can hand-paint your photo booth, or spray-paint a base color over the whole board like we did.
Paint the scarecrow design on the front of the photo booth board. I added a ‘fall festival’ sign on the fence, but you could add a family name, school name, or anything else you want.
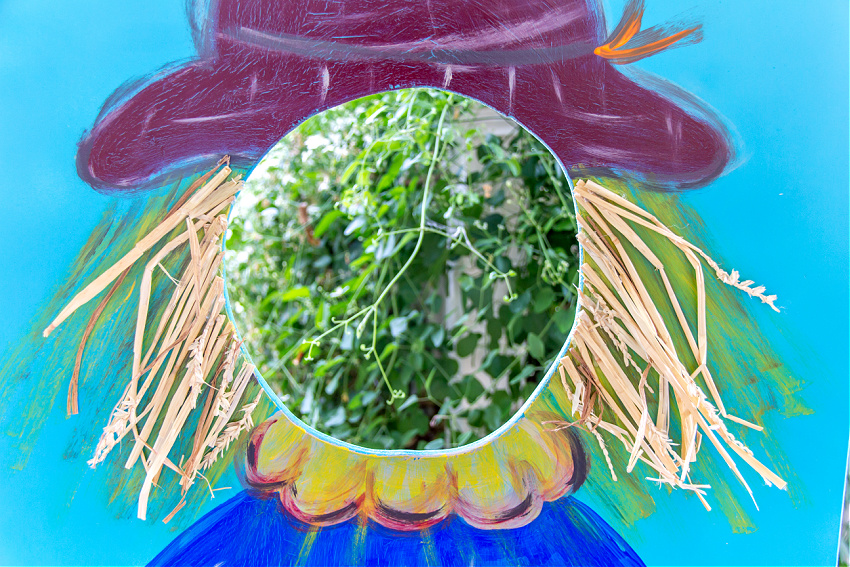
Cut small pieces of straw, and using hot glue attach a little straw under the scarecrow’s hat and above the hands holding the sign.
Please pin post for later